Friday, November 15, 2013
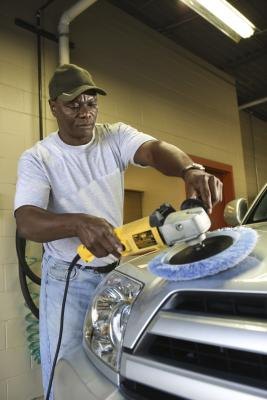
How to Rotary Buff Your Car

A rotary power buffer is an excellent method for buffing scratches out of your car, but it comes with a few risks. Improper use of a buffer can lead to permanent paint damage, so it is important to ensure you are familiar with the process before you test your luck on your new ride. Rotary buffing is relatively simple in theory, but requires a bit of practice to perfect. Once you are comfortable with the mechanics of using a power buffer to polish your car, you will be able to make corrections to small paint problems with ease.
Instructions
- 1
Wash your car thoroughly with a gentle dishwashing soap. It is imperative you start with a clean working surface. A quick squirt of dishwashing soap into a 5 gallon bucket is usually enough to get a nice, sudsy mix.
2Place sandpaper into a bucket of water and leave it to soak for at least an hour.
3Wrap the wet sandpaper around the sanding block and start to sand the correct area on your car. Sand each panel in the same direction the wind would travel over it. Keep the sanding surface as wet as you can.
4Continue sanding until the area you are working on is filled with even, flat paint. At this point, you have successfully removed the clear coat and further sanding will begin to damage the actual paint job.
5Wash the sanded area again and allow it to dry before continuing onto the polishing process.
6Add the rubbing compound into the scratches surrounding the sanded area and run your rotary buffer over the surface at about 1,400 rpm with the cutting pad attached. Do not leave the buffer in any one area longer than a couple of seconds, and work the buffer over the entire sanded surface until the compound dries and begins to flake off. Set the rpm speed on the settings dial on the variable speed rotary buffer.
7Wash the sanded area again and examine it for scratches. If you successfully removed the scratches around the sanded area, you can move on. If not, you will need more rubbing compound and another bit of buffing.
8Apply polishing pad glaze to the polishing pad and run it over the entire sanded surface. Buff in the opposite direction from the way in which you buffed the rubbing compound until you see the surface reach a high, shiny gloss. At this point, you can continue working to buff out remaining scratches with the polishing pad.
No comments:
Post a Comment